Sometimes producing a good animated GIF requires a few advanced tweaks, for which scripting can help. So I added a GIF export feature to MoviePy, a Python package originally written for video editing.
For this demo we will make a few GIFs out of this trailer:
Converting a video excerpt into a GIF
In what follows we import MoviePy, we open the video file, we select the part between 1’22.65 (1 minute 22.65 seconds) and 1’23.2, reduce its size (to 30% of the original) and save it as a GIF:
from moviepy.editor import *

clip = (VideoFileClip("./frozen_trailer.mp4")
        .subclip((1,22.65),(1,23.2))
        .resize(0.3))
clip.write_gif("use_your_head.gif")

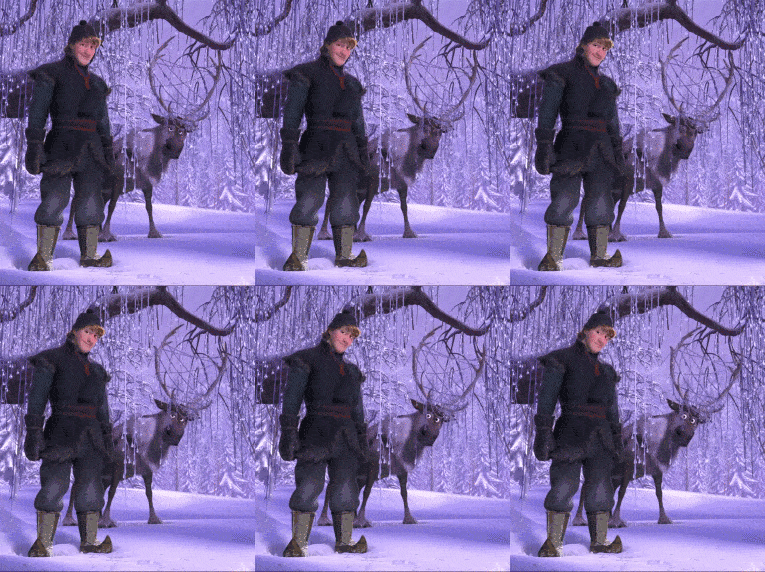
Cropping the image
For my next GIF I will only keep the center of the screen. If you intend to use MoviePy, note that you can preview a clip with clip.preview(). During the preview clicking on a pixel will print its position, which is convenient for cropping with precision.
kris_sven = (VideoFileClip("./frozen_trailer.mp4")
             .subclip((1,13.4),(1,13.9))
             .resize(0.5)
             .crop(x1=145,x2=400)) # remove left-right borders
kris_sven.write_gif("kris_sven.gif")

Freezing a region
Many GIF makers like to freeze some parts of the GIF to reduce the file size and/or focus the attention on one part of the animation.
In the next GIF we freeze the left part of the clip. To do so we take a snapshot of the clip at t=0.2 seconds, we crop this snapshot to only keep the left half, then we make a composite clip which superimposes the cropped snapshot on the original clip:
anna_olaf = (VideoFileClip("./frozen_trailer.mp4")
             .subclip(87.9,88.1)
             .speedx(0.5) # Play at half speed
             .resize(.4))

snapshot = (anna_olaf
            .crop(x2= anna_olaf.w/2) # remove right half
            .to_ImageClip(0.2) # snapshot of the clip at t=0.2s
            .set_duration(anna_olaf.duration))

composition = CompositeVideoClip([anna_olaf, snapshot])
composition.write_gif('anna_olaf.gif', fps=15)

Freezing a more complicated region
This time we will apply a custom mask to the snapshot to specify where it will be transparent (and let the animated part appear) .
import moviepy.video.tools.drawing as dw

anna_kris = (VideoFileClip("./frozen_trailer.mp4", audio=False)
             .subclip((1,38.15),(1,38.5))
             .resize(.5))

# coordinates p1,p2 define the edges of the mask
mask = dw.color_split(anna_kris.size, p1=(445, 20), p2=(345, 275),
                      grad_width=5) # blur the mask's edges

snapshot = (anna_kris.to_ImageClip()
            .set_duration(anna_kris.duration)
            .set_mask(ImageClip(mask, ismask=True))

composition = CompositeVideoClip([anna_kris,snapshot]).speedx(0.2)
# 'fuzz' (0-100) below is for gif compression
composition.write_gif('anna_kris.gif', fps=15, fuzz=3)

Time-symetrization
Surely you have noticed that in the previous GIFs, the end did not always look like the beginning. As a consequence, you could see a disruption every time the animation was restarted. A way to avoid this is to time-symetrize the clip, i.e. to make the clip play once forwards, then once backwards. This way the end of the clip really is the beginning of the clip. This creates a GIF that can loop fluidly, without a real beginning or end.
def time_symetrize(clip):
    """ Returns the clip played forwards then backwards. In case
    you are wondering, vfx (short for Video FX) is loaded by
    >>> from moviepy.editor import * """
    return concatenate([clip, clip.fx( vfx.time_mirror )])

clip = (VideoFileClip("./frozen_trailer.mp4", audio=False)
        .subclip(36.5,36.9)
        .resize(0.5)
        .crop(x1=189, x2=433)
        .fx( time_symetrize ))

clip.write_gif('sven.gif', fps=15, fuzz=2)

Ok, this might be a bad example of time symetrization,it makes the snow flakes go upwards in the second half of the animation.
Adding some text
In the next GIF there will be a text clip superimposed on the video clip.
olaf = (VideoFileClip("./frozen_trailer.mp4", audio=False)
        .subclip((1,21.6),(1,22.1))
        .resize(.5)
        .speedx(0.5)
        .fx( time_symetrize ))

# Many options are available for the text (requires ImageMagick)
text = (TextClip("In my nightmares
I see rabbits.",
                 fontsize=30, color='white',
                 font='Amiri-Bold', interline=-25)
        .set_pos((20,190))
        .set_duration(olaf.duration))

composition = CompositeVideoClip( [olaf, text] )
composition.write_gif('olaf.gif', fps=10, fuzz=2)

Making the gif loopable
The following GIF features a lot of snow falling. Therefore it cannot be made loopable using time-symetrization (or you will snow floating upwards !). So we will make this animation loopable by having the beginning of the animation appear progressively (fade in) just before the end of the clip. The montage here is a little complicated, I cannot explain it better than with this picture:

castle = (VideoFileClip("./frozen_trailer.mp4", audio=False)
          .subclip(22.8,23.2)
          .speedx(0.2)
          .resize(.4))

d = castle.duration
castle = castle.crossfadein(d/2)

composition = (CompositeVideoClip([castle,
                    castle.set_start(d/2),
                    castle.set_start(d)])
               .subclip(d/2, 3*d/2))

composition.write_gif('castle.gif', fps=5,fuzz=5)

Another example of a GIF made loopable
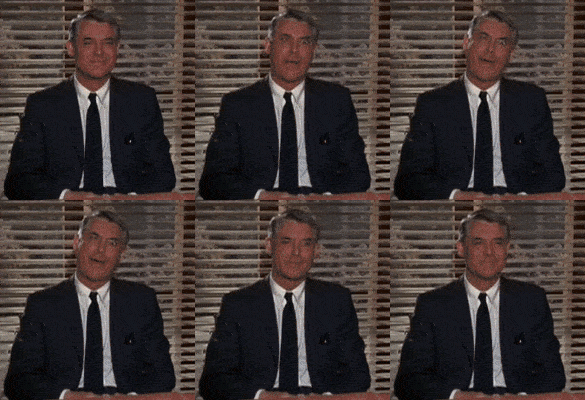
The next clip (from the movie Charade) was almost loopable: you can see Carry Grant smiling, then making a funny face, then coming back to normal. The problem is that at the end of the excerpt Cary is not exactly in the same position, and he is not smiling as he was at the beginning. To correct this, we take a snapshot of the first frame and we make it appear progressively at the end. This seems to do the trick.
carry = (VideoFileClip("../videos/charade.mp4", audio=False)
         .subclip((1,51,18.3),(1,51,20.6))
         .crop(x1=102, y1=2, x2=297, y2=202))

d = carry.duration
snapshot = (carry.to_ImageClip()
            .set_duration(d/6)
            .crossfadein(d/6)
            .set_start(5*d/6))

composition = CompositeVideoClip([carry, snapshot])
composition.write_gif('carry.gif', fps=carry.fps, fuzz=3)
